
Live Streaming My Wedding
While organising our wedding it became apparent that there would be some very important people who unfortunately could not attend. So, we decided to have a go at live streaming the ceremony for them.
The wedding live streaming industry became quite massive in 2020, and with a full range of options: from leaning your phone against some books and starting a free (40 minute) Zoom call, all the way to paying multiple thousands of dollars for a team. We wanted neither of these. We wanted to be in control, but also had to contend with the reality of your own wedding day—there are just too many things to do, and of course we wanted to enjoy it—we didn’t want managing the stream to get in the way.
There are a few main components to a successful livestream: the camera, the audio, the computer, and the running of the show.
Camera
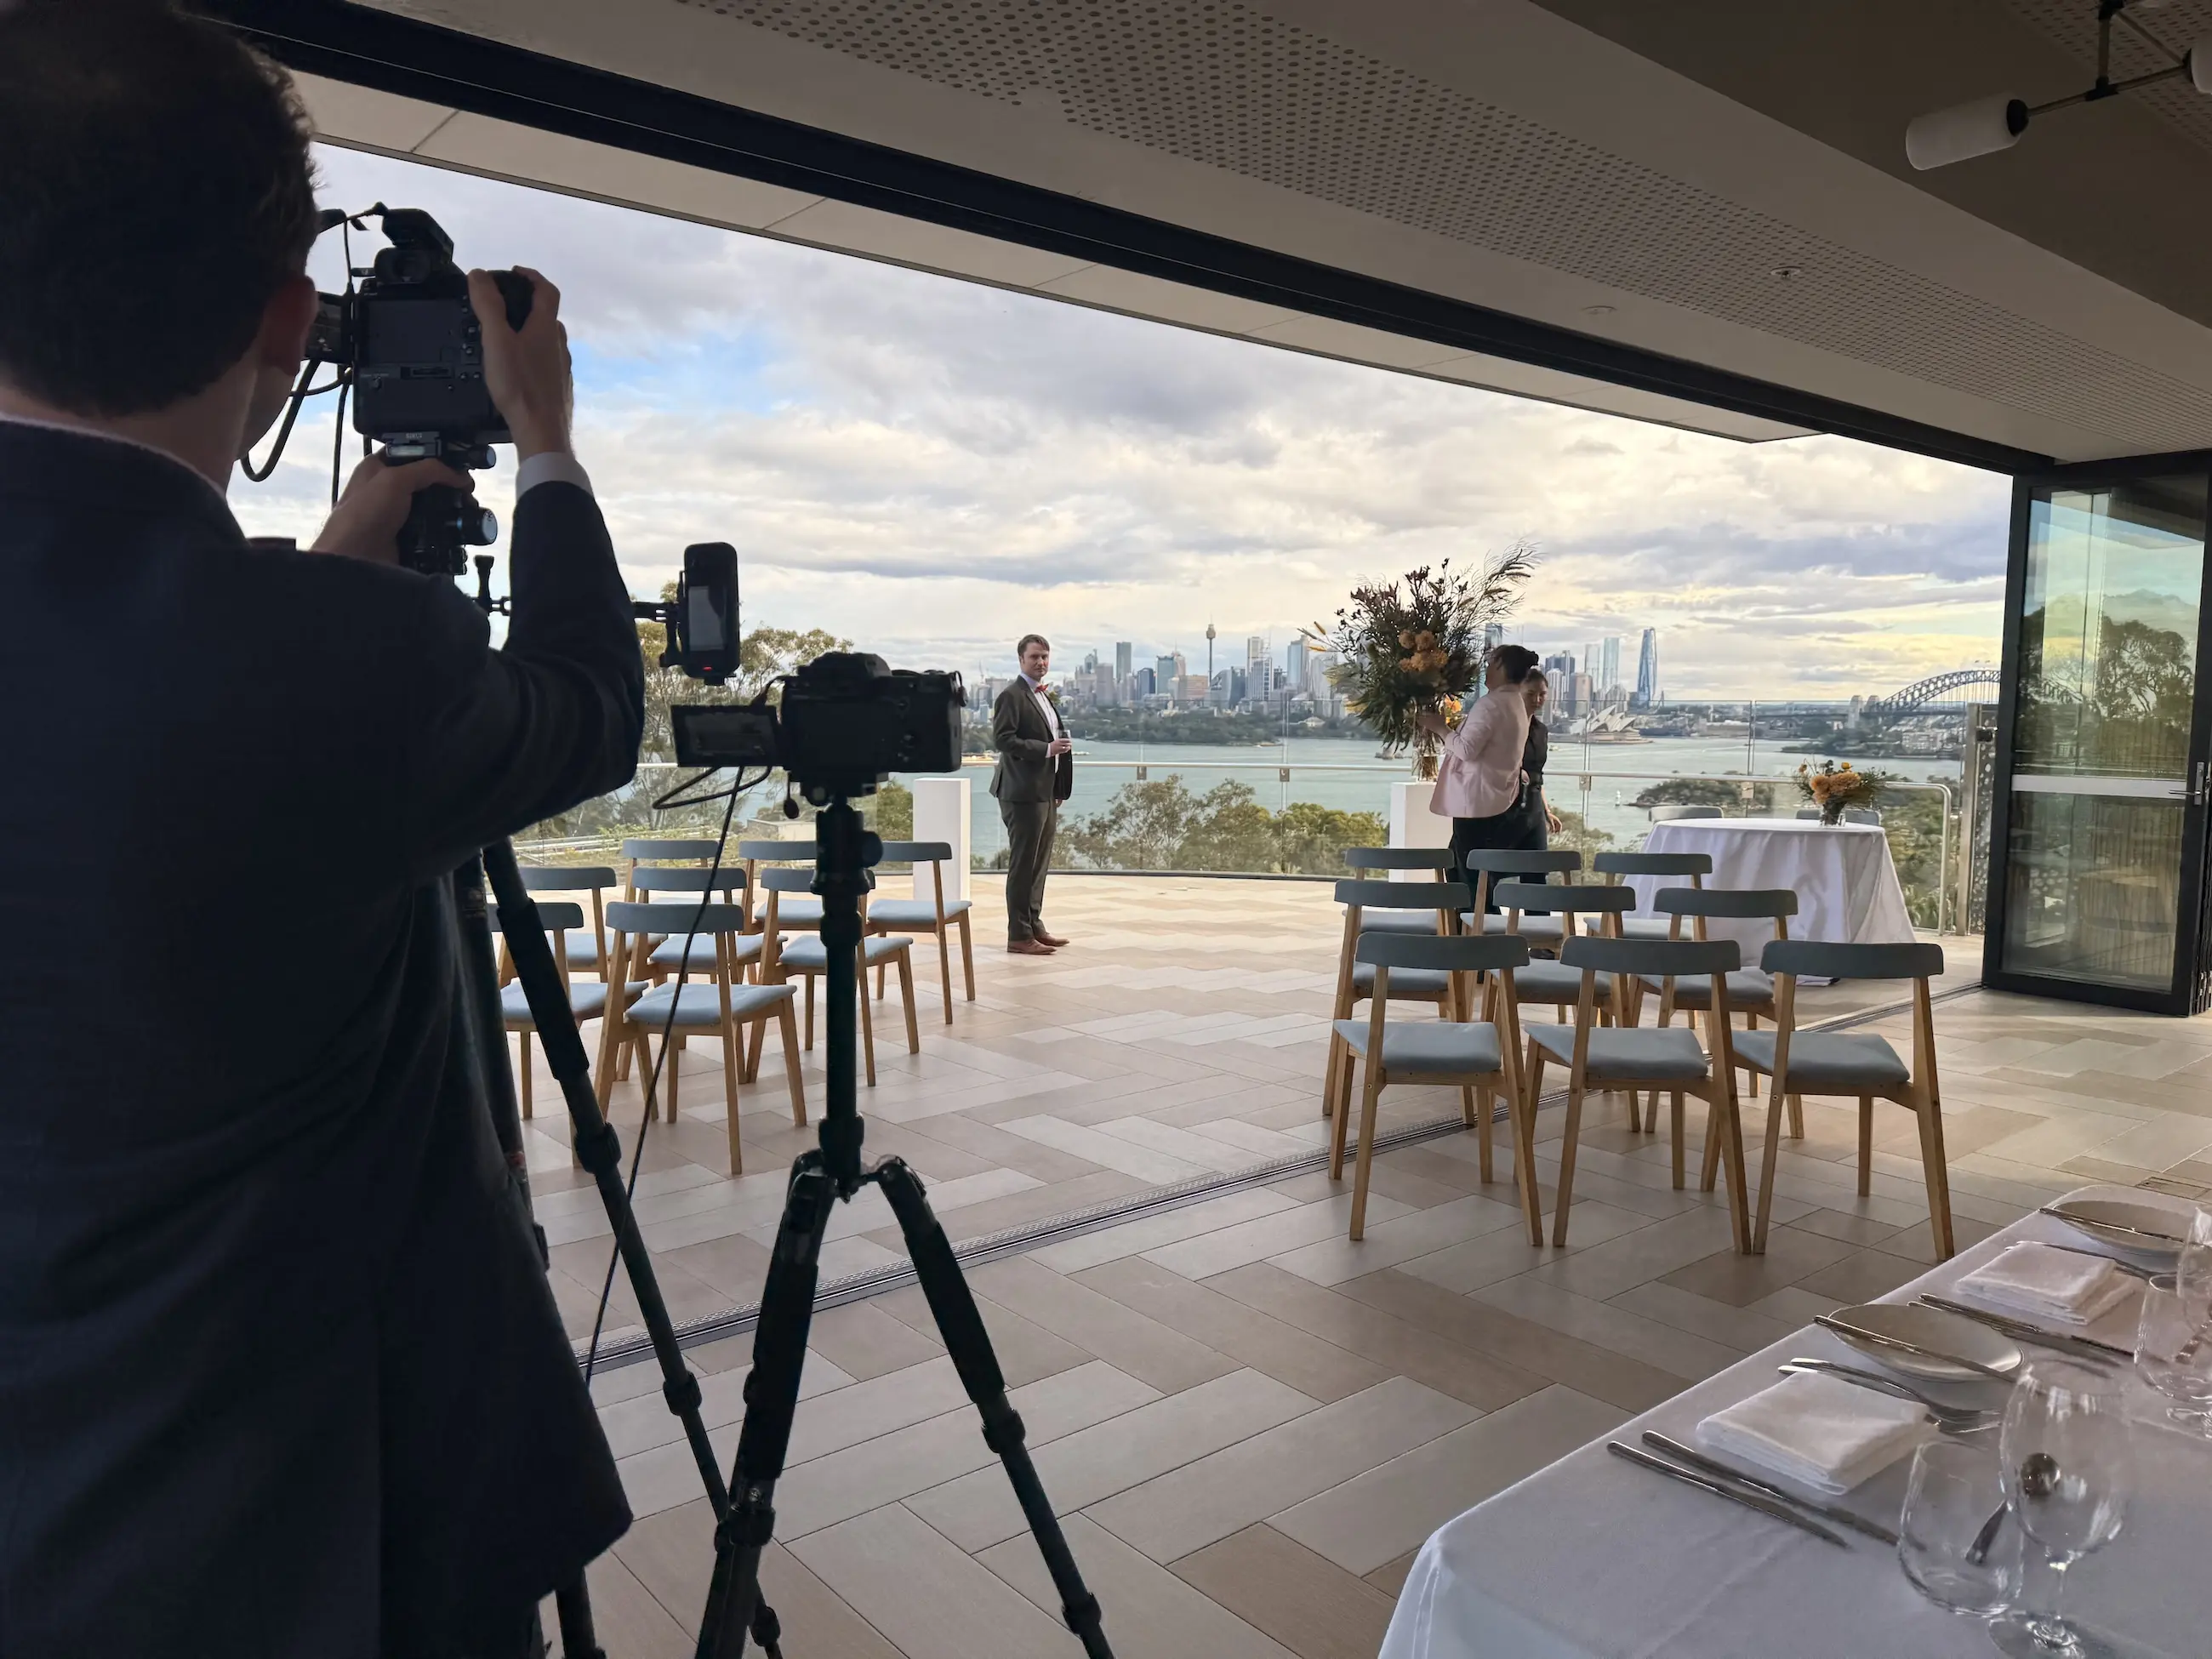
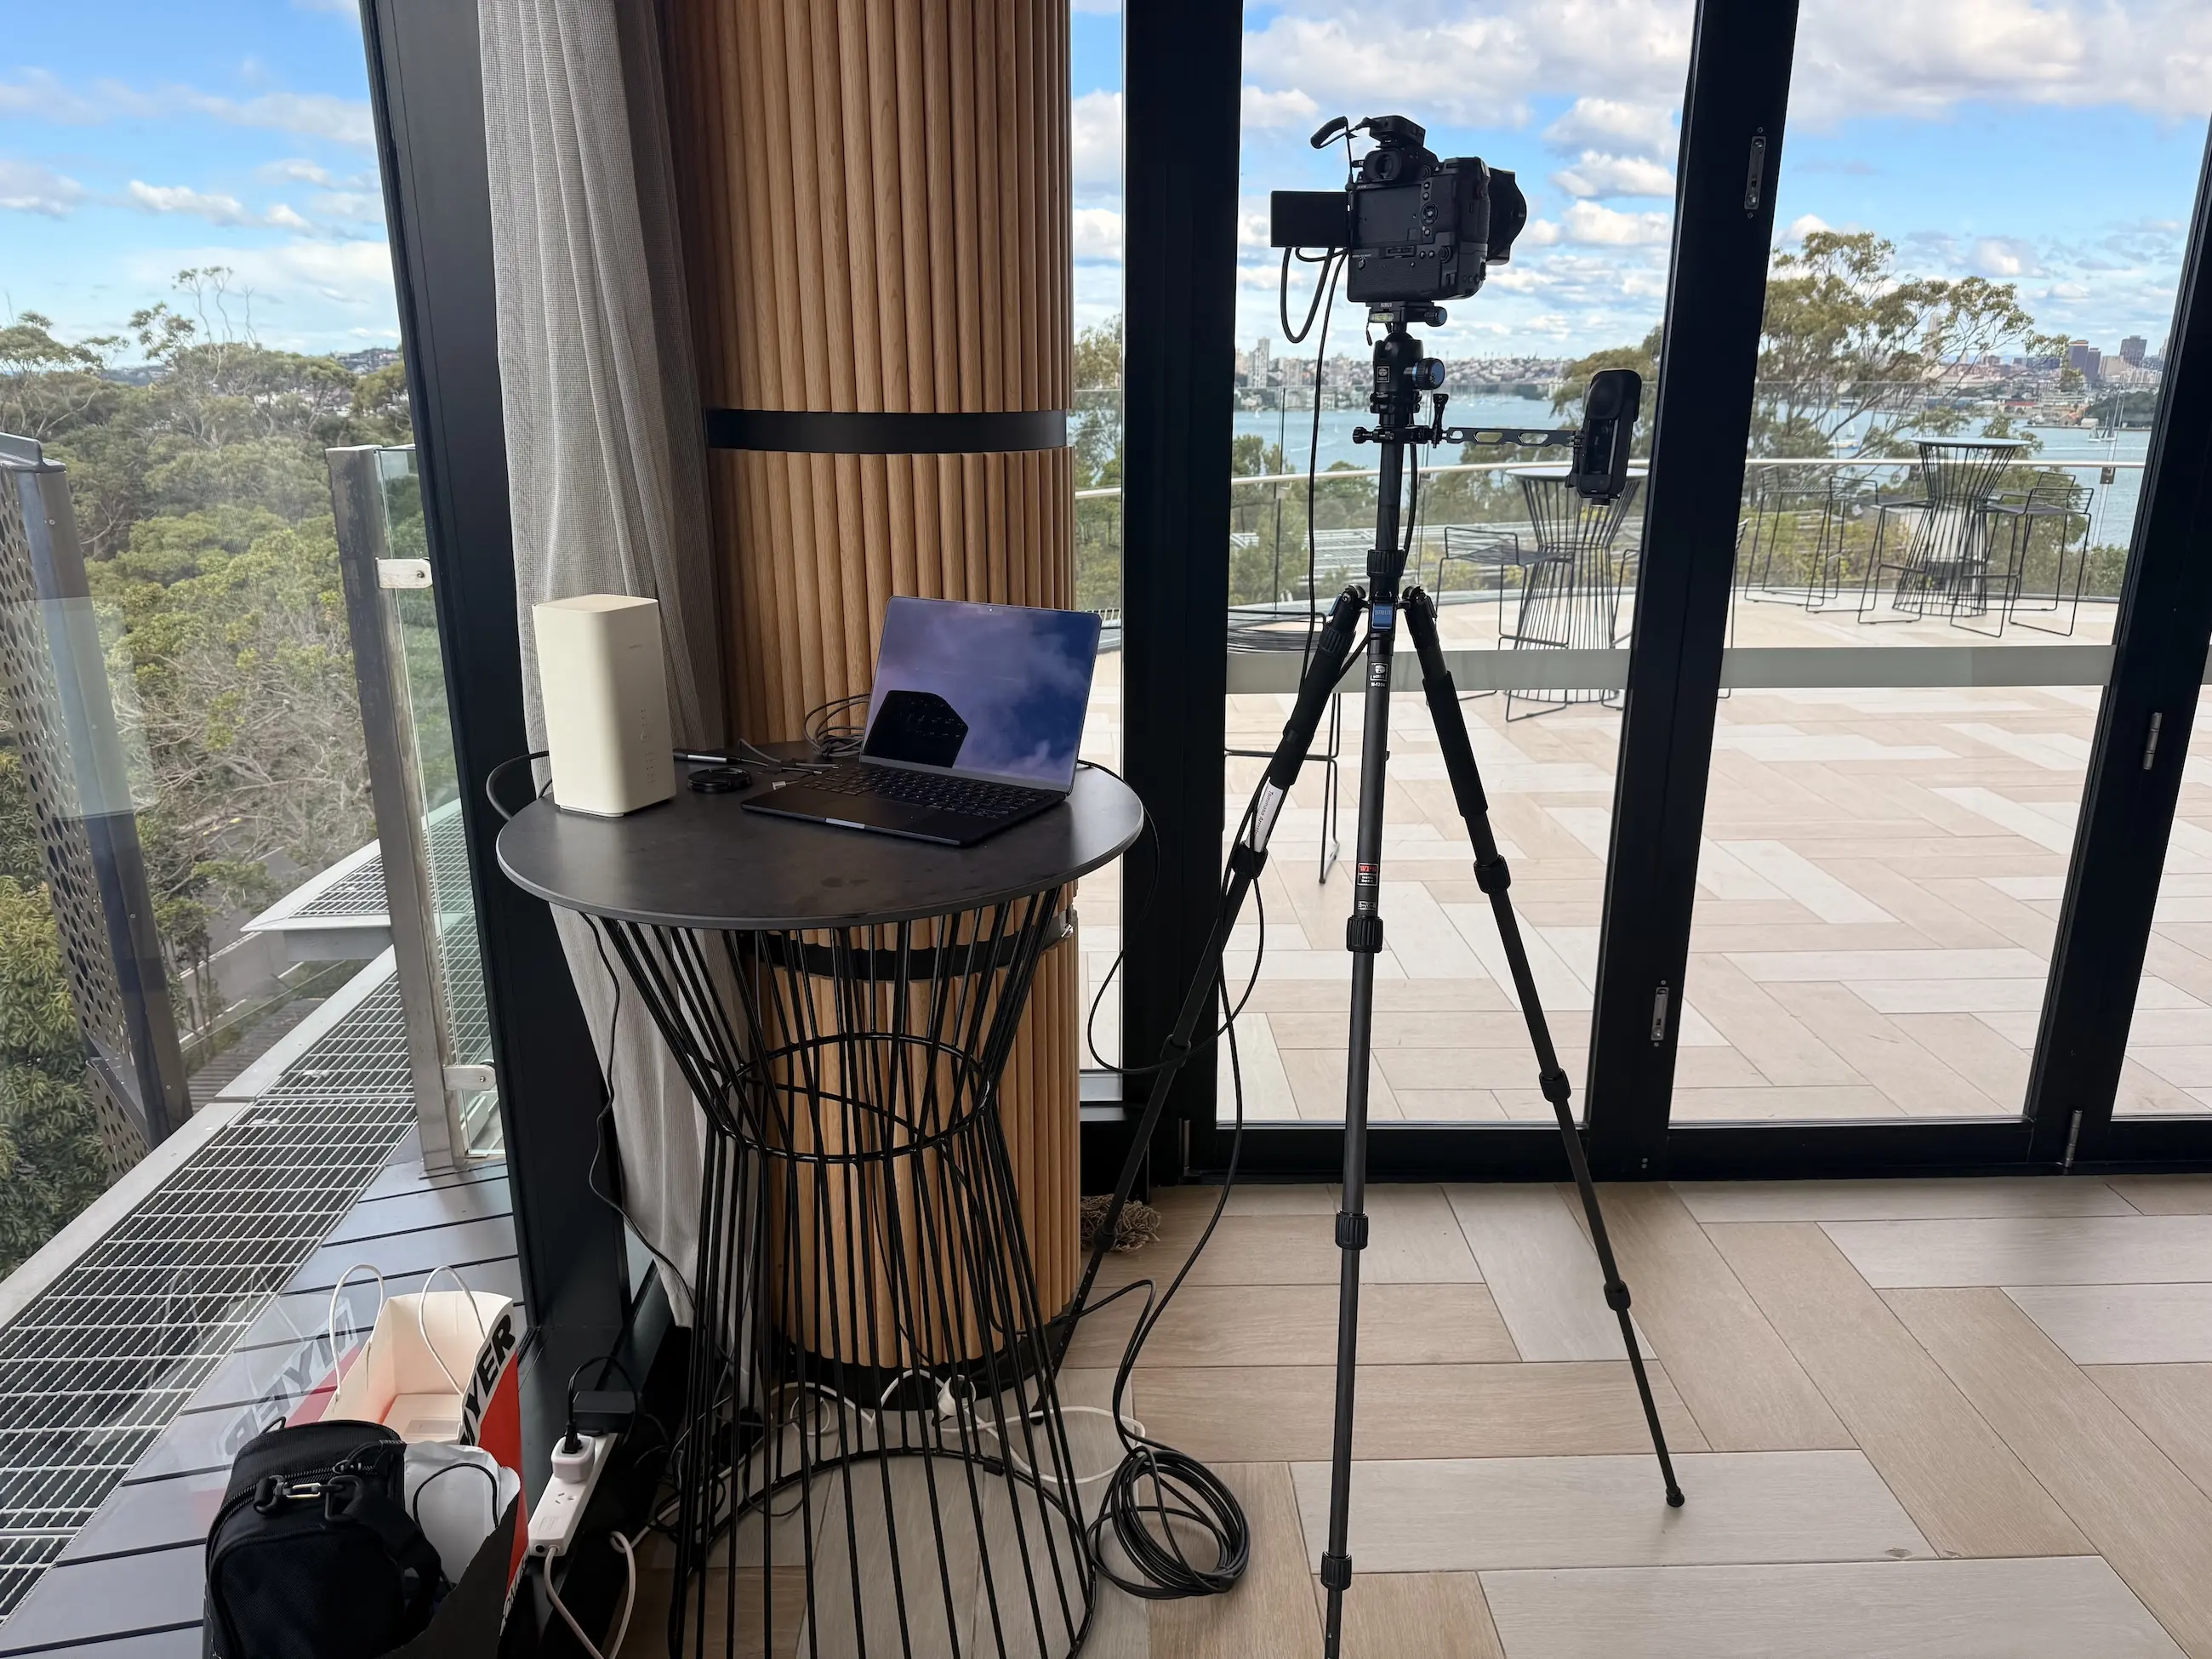
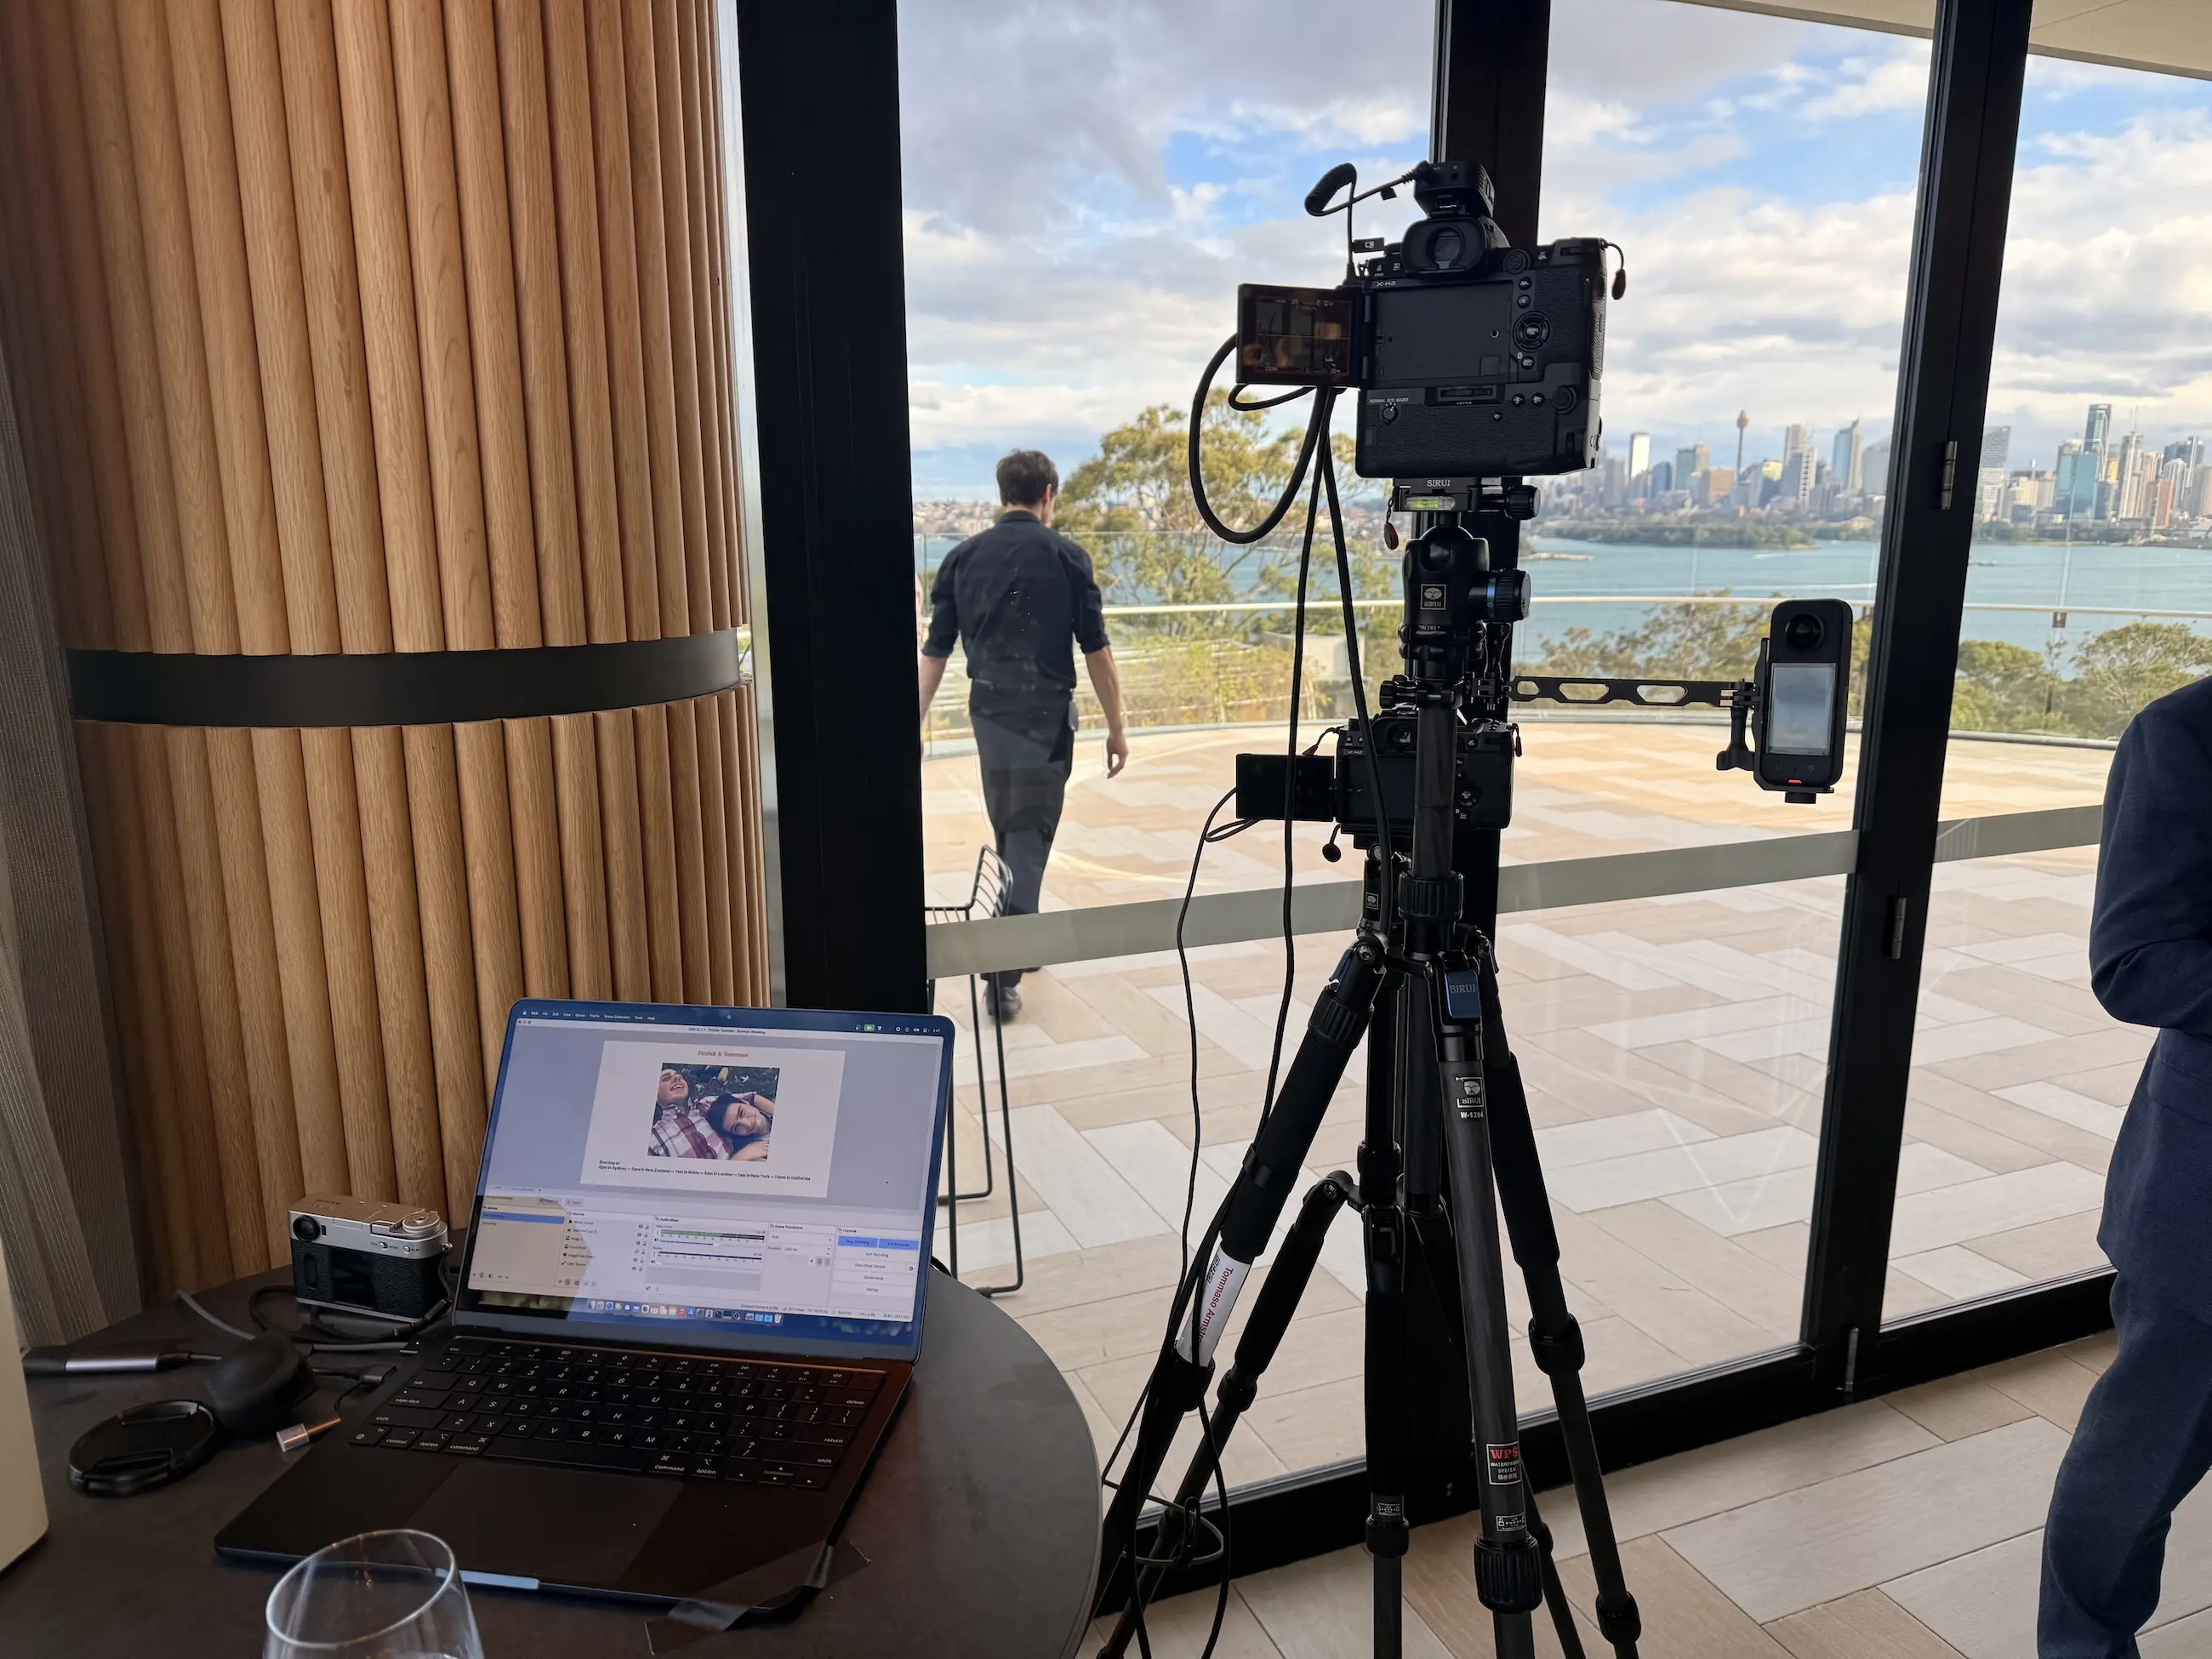
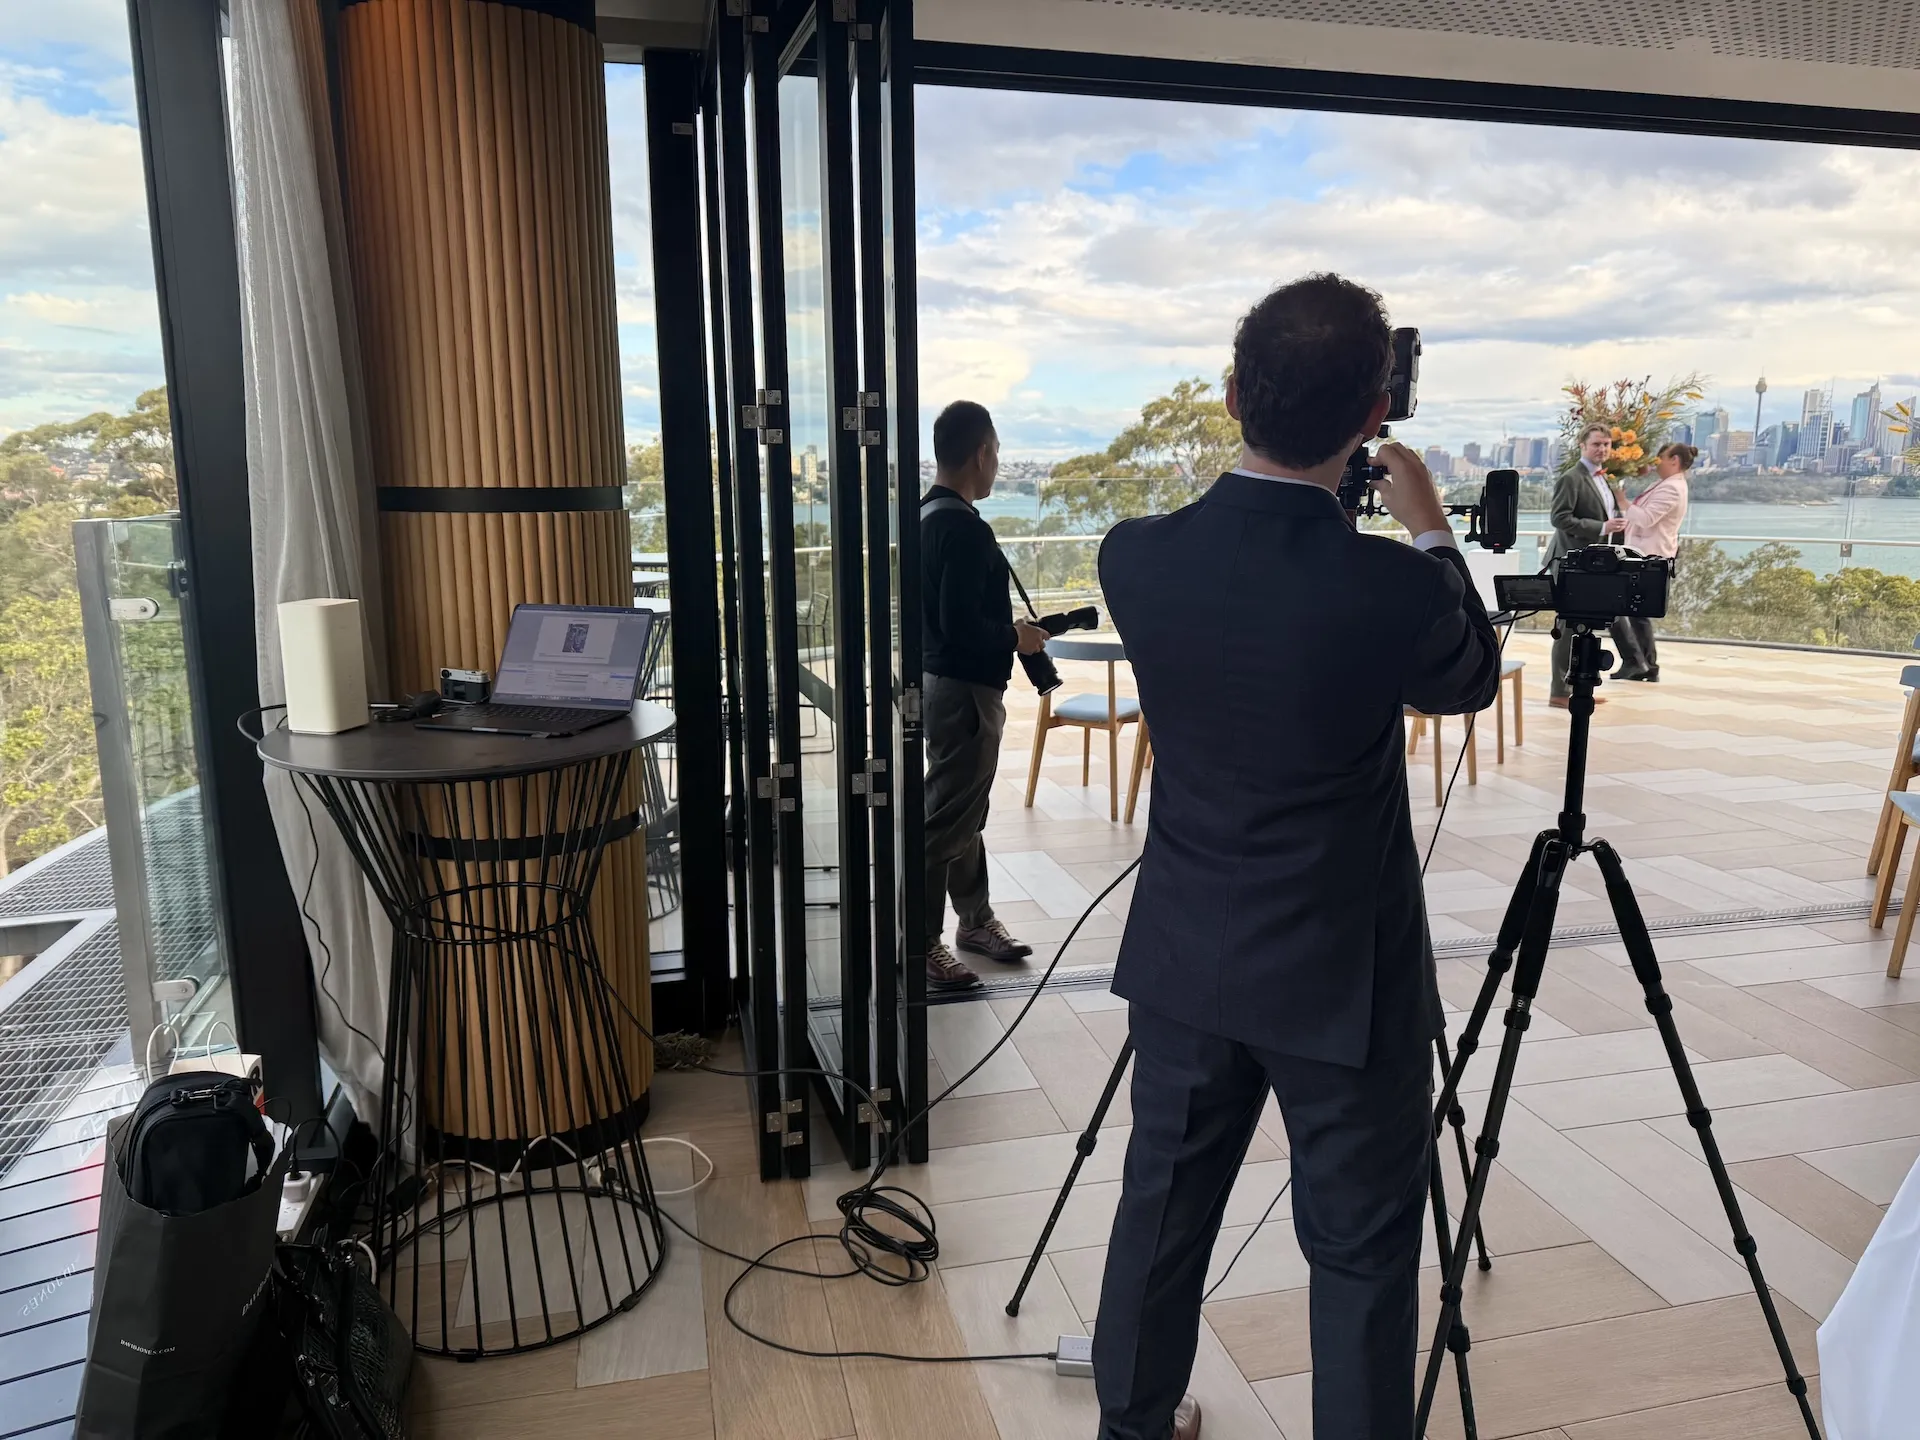
We elected to use Tommaso’s FujiFilm X-H2 on a tripod, with a second camera as a backup, also recording but not live streaming. I attached my Insta360 to the tripod, as another backup and to record the entire room in case something of interest way outside of frame.
The microphone receiver (see audio below) plugged into the 3.5mm input on the camera. This camera can record internally at impressive resolutions and bitrates, luckily we were able to borrow a monster 1TB CFexpress card for the internal recording. It also had HDMI output, which we configured to 1080p to hook up to the computer. Despite having likely more than enough power from the three batteries (one internal, two in the battery grip1) we also hooked up USB-C power in to ensure stability.
In the interest of recording the best quality we could for longevity we recorded in F-Log so we could recover highlights and shadows later. This did mean the HDMI feed looked very washed out, so we had to handle that in the live streaming software.
Audio
For months audio was a big concern for me. People can generally tolerate low quality video, but almost no one can tolerate poor audio. Cameras tend to have mediocre microphones, and we were relying on hiding the camera quite far from the action; so we had to get external audio. Quite a good option here is to find a way to hook into the venue’s PA system since many weddings will have a microphone for the celebrant—but given we planned this wedding from 12,000km away and only saw the venue in person exactly 24 hours before, we really couldn’t rely on any venue equipment. So: lavalier microphones.
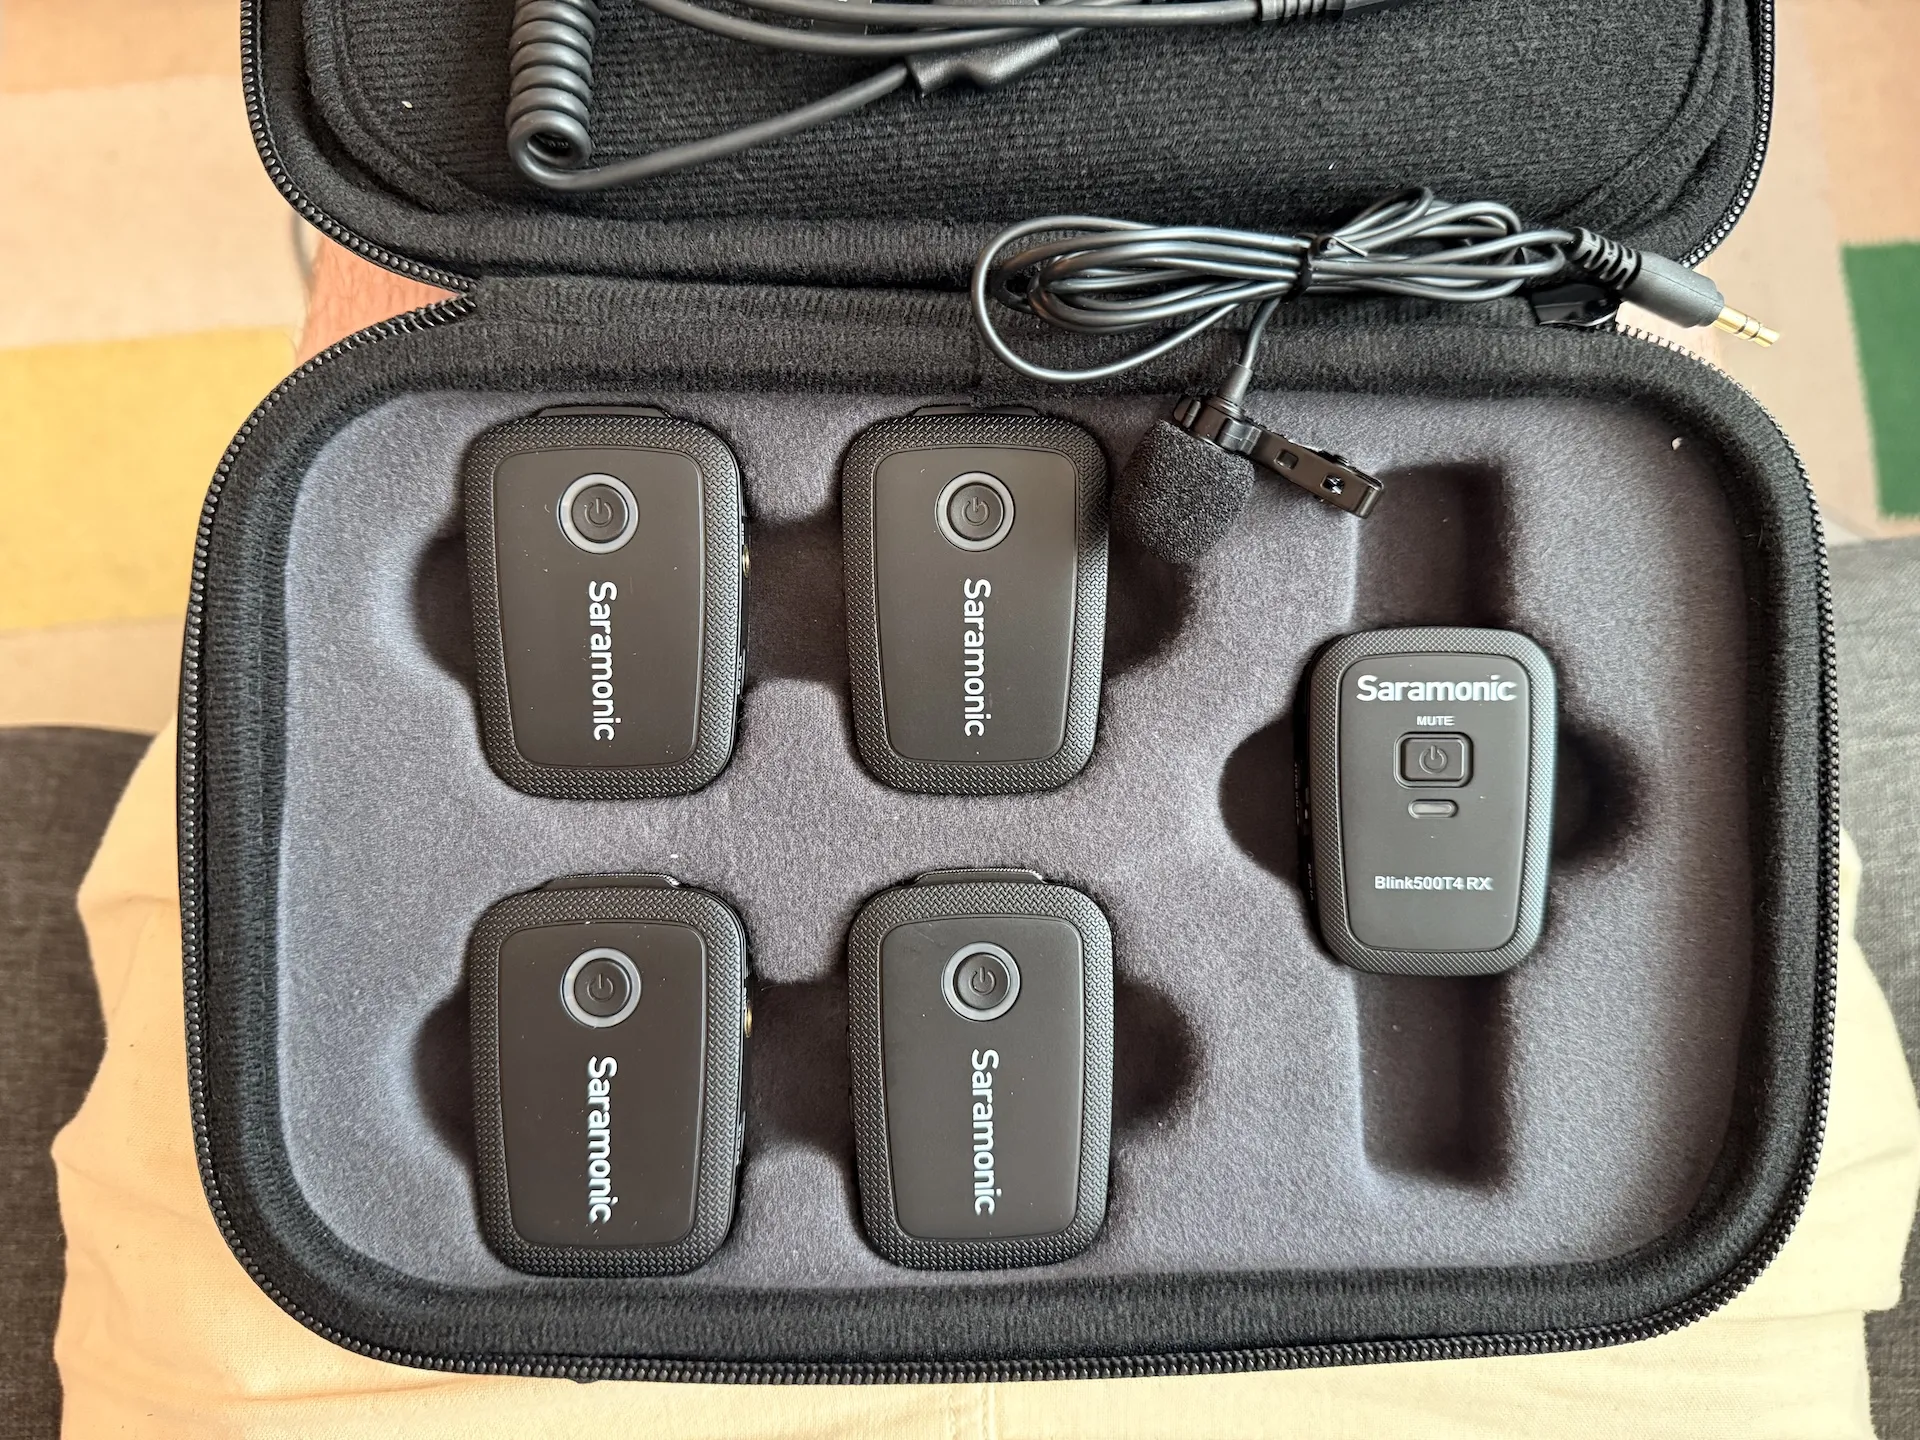
Lav mics tend to come in two varieties: the classic body pack wirelessly transmitting over radio frequencies to a rack mounted receiver that costs two-grand, and the small all-in-one 2.4GHz packs from modern companies. The catch with the former is cost and setup hassle; the catch with the latter is they all come in two-packs, meaning we’d need two separate receivers to mic up three people. I really didn’t like the idea of someone not being heard, so I searched high and low for a modern 2.4GHz system that supported more than two transmitters per receiver and finally found the Saramonic Blink500 T4 at a really good price “used once” on eBay.
Most modern systems now include wind/noise cancellation modes, which does make the cut off at the end of sentences a bit abrupt, but on a rooftop ceremony it was absolutely worth enabling.
Hiding the Microphones
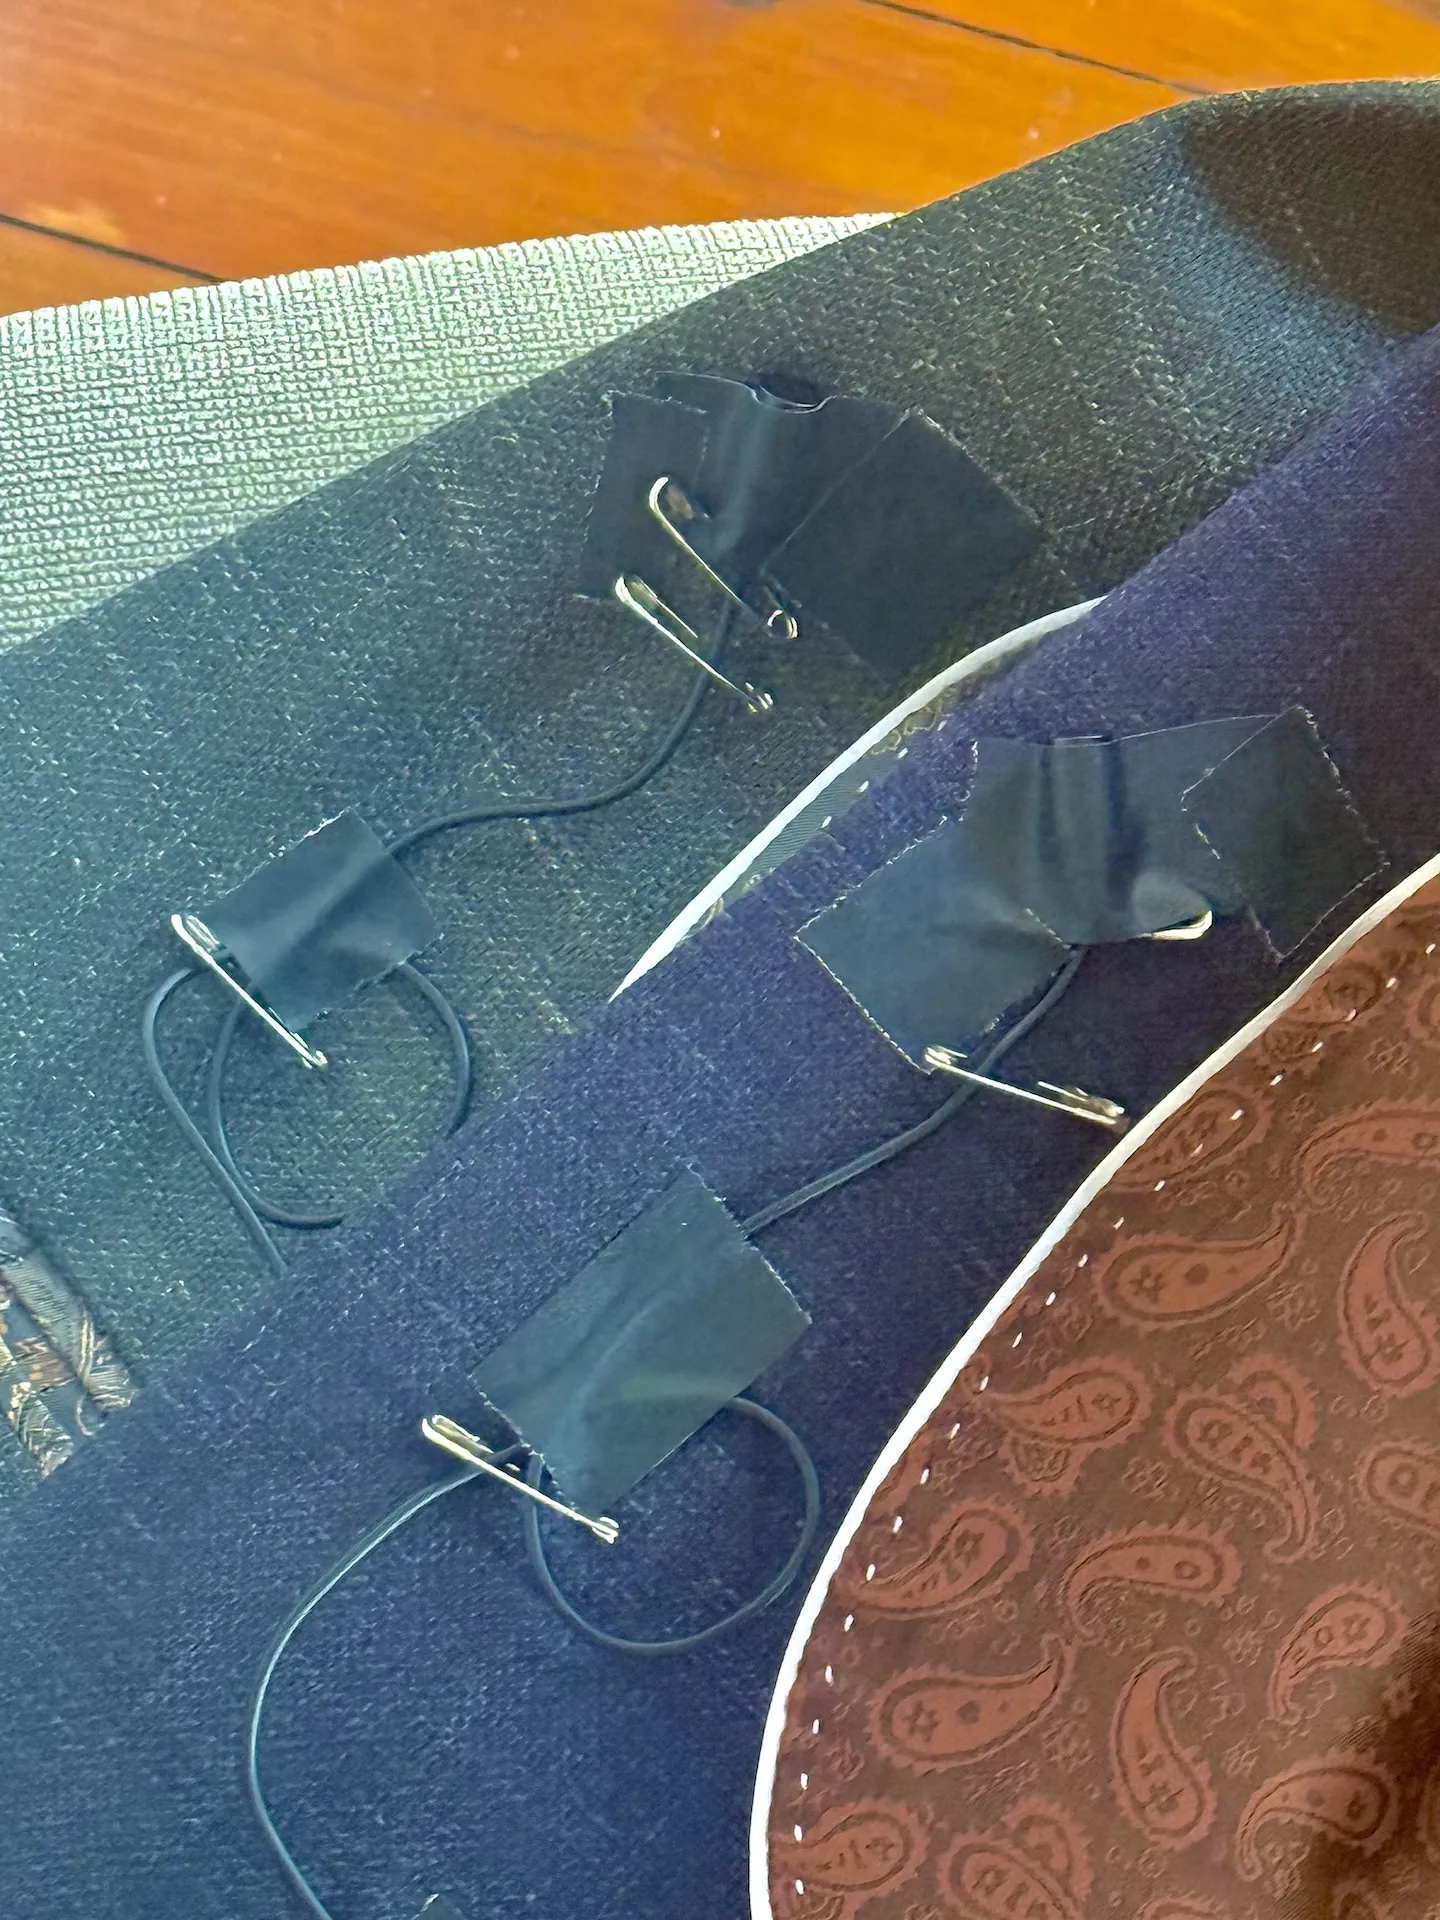
Another hard requirement I had was to never see the microphones in any photos, so I haphazardly attached the capsules to the insides of our suit jackets using a combination of gaffer’s tape and safety pins. Not the best job but it worked. The transmitter was hidden in our pocket so it was easy to toggle on and off based on if we wanted to be heard (see running the show).
Computer
Hardware
I used my MacBook Air (M2) as the brains of the operation. It has an outstanding battery life, and while it has limited number of ports compared to a MacBook Pro, it had enough for us.
We used a (generic) long 10m HDMI cable to get the signal out of the FujiFilm camera (which was ultimately was much longer than needed—but again, planning from afar) into a cheap 1080p HDMI to USB-A capture card, and then into a USB-C port on the Mac.
Connectivity
As part of planning this without visiting the venue, I had to worry about internet connectivity. The venue did have captive-portal free Wi-Fi, but that seemed far too risky for something we’d leave running unattended for a few hours. We reached for a large 4G Modem my father had acquired in 2020 for working from home, and walked into a local supermarket to pick up an Amaysim SIM card. It is always interesting that the way to get the most data for the cheapest price is to just pay for prepaid month of a normal phone plan, not to get a data only plan.
In the week leading up to the wedding I ran multiple tests broadcasts over the 4G modem, measuring to ensure both latency/speed was ok, and to see how much data was being used—so I could buy a larger plan if needed. Ultimately, we used very little data and the original plan covered all the tests and the main event.
Streaming services
I wanted our livestream to be both private but also very easy for folks to access. Since this whole thing was also a bit of a hobbyest project in live video production (obviously, if you couldn’t tell), I did explore all sorts of self hosting and Cloudflare’s products; various ideas around stream to one place and then simulcast to multiple platforms without consuming additional local bandwidth.
As the wedding approached and my need to have this work unmonitored surpassed my desire to build something bespoke, I started closing in on Amazon’s Twitch and YouTube. I picked YouTube as most of the key viewers are on the older side and likely never used Twitch, plus I have a very old YouTube channel which granted me access not generally available immediately upon account creation.
While I created a lot of test streams and used those before the day, I also set up the actual one early so I could start sending it to people. This allowed them to register to be notified when the stream went live. This is another nice feature of the YouTube setup over competing platforms.
Local software
To send video to YouTube you can use their website in a Chromium-based browser, but I wanted more control so reached for the Open Broadcasting Software project (OBS—not to be confused with the Olympic Broadcasting Services).
OBS allowed me to configure YouTube as a stream destination along with the filesystem (so I’d have a saved copy on disk). As mentioned in the camera section, we needed to deal with the F-Log footage. OBS allowed applying a LUT in realtime, so I was able to load in one of the default Fuji LUTs to get back to a presentable image.
I set up two scenes, one for the video stream and one with a slideshow that I could play for the hour beforehand as a preshow. The slideshow included photos of Tommaso and I over the years, the timestamp of the ceremony, and had some royalty free jazz playing in the background (I ran multiple test streams of just the preshow to ensure it wouldn’t get flagged by ContentID and kill the stream.)
I could then just use the OBS scene transition tool (I set a long fade on the transition) right before the ceremony. Which brings us to running the show.
Running the Show
We got access to the room from 1pm onwards on the day, with the ceremony starting at 3pm-ish. At that time we went up and set up the cameras, WiFi, laptop, and power all on a small bar table in the corner.
At 2:30 when we got up to the room before the ceremony, I started the stream on OBS to the preconfigured YouTube stream, which kicked off the preshow slideshow. I started recording on the Insta 360.
As we suited up, we plugged in the microphone packs, but left them turned off. We also attached a microphone to our celebrant, we left that one running as we didn’t expect someone else to have to participate in this charade.
Closer to 3pm Tommaso started the main FujiFilm cameras up, and hit record on them while the slideshow continued. At this time I opened YouTube on my phone and confirmed that I could both see the slideshow and hear the music—this also gave me an opportunity to see some live comments from folks around the world.
After everyone was seated, and just before our mothers and we left to begin the processional, we turned on our microphones, I hit scene transition and walked away…
It All Worked
We received many photos of our friends and families (and their pets) watching at all different times of day on their TVs and iPads around the world. To get to include people in our very small wedding in Sydney made all the effort worth it.
During the marriage certificate signing, Tommaso and I had prearranged to turn off our microphones, this allowed us to confer quietly without anyone hearing. I’m so glad we did that.
There was a rainbow during the ceremony, unfortunately the stream camera didn’t pick it up, but having a wider angled 2nd camera and the very wide Insta 360 means that we still have that footage.
Right after the ceremony I hit scene transition again, sending the folks at home back to the slideshow. When I got a moment to catch my breath during photographs (proverbially, I don’t think I actually caught my breath until we sat down for dinner) I ended the stream formally on OBS and closed my laptop lid. We turned off the FujiFilm cameras at that time too, the Insta 360 ran until its battery died, so I have a few hours of that day.
When I get the time I want to properly edit the video, but hey it’s been more than a year and I’m only writing this up now. It takes some coordination and planning but I’m really really really glad we have incredibly high quality videos of our ceremony, and managed to beam it around the world live all for what wasn’t that much effort in the grand scheme of a wedding. If you have more than 18 people at your wedding, maybe ask a friend to do the on the day stuff though…
-
This is another of my favourite FujiFilm features: adding on the battery grip doesn’t double your capacity but triples it! Unlike battery grips I’ve used in the past on Canon et al. ↩